Level 98
15 Rings · 8 Board
The game has different level schedules, so the board for the same level number may differ. Choose the thumbnail that matches your game.
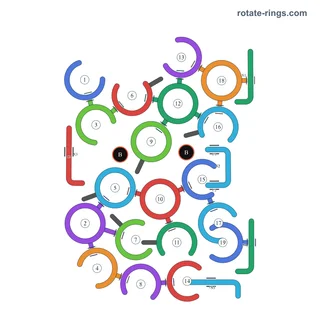
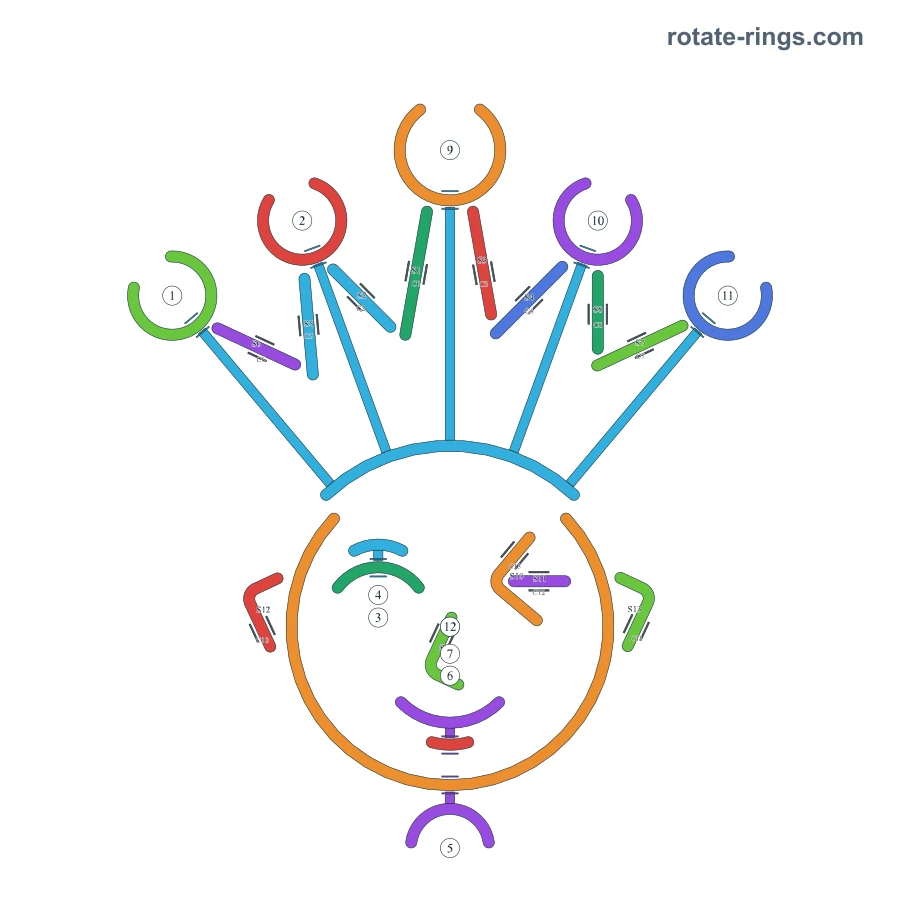
16 rings, 10 blocking pins, 12 slide bars, 12 clamps
12345678910111213141516
Default A · Numbers identify the rings on the diagram; they do not specify an operation order.
Filters examine every variant; choose a thumbnail to compare a matching board.
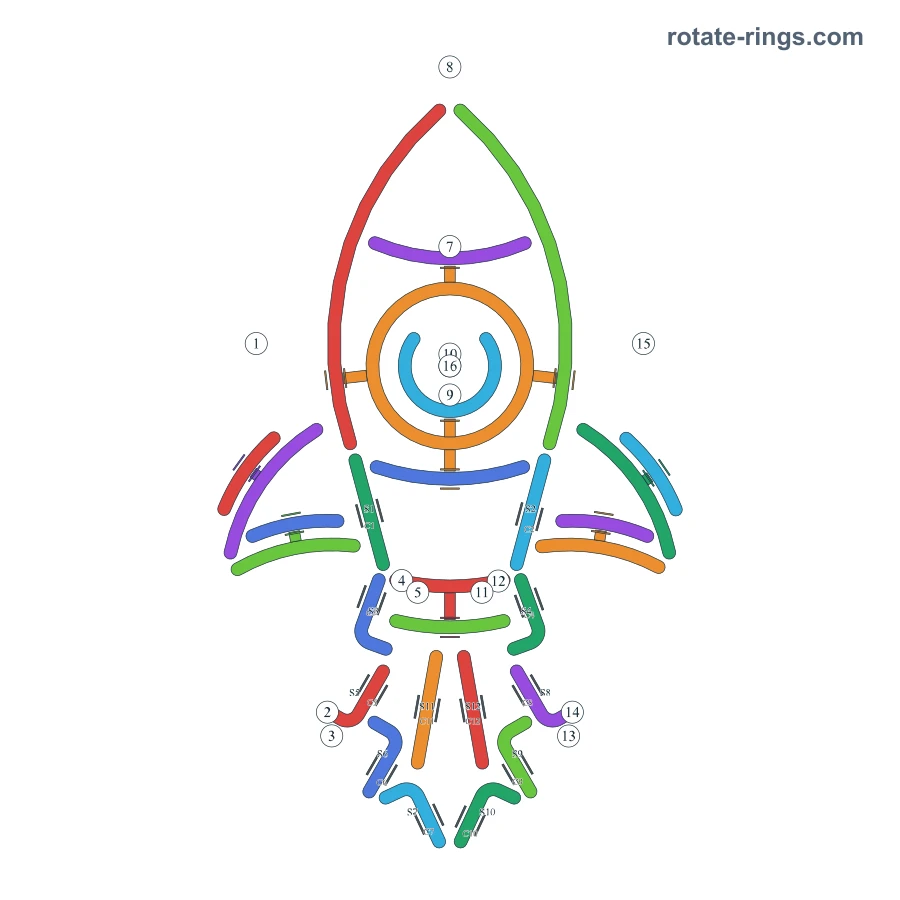
16 rings, 10 blocking pins, 12 slide bars, 12 clamps
12345678910111213141516
Numbers identify the rings on the diagram; they do not specify an operation order.
Numbers identify individual rings; S labels bars, C labels clamps, and B marks a bomb. Match the colored rings, pins, slide bars and clamps to your board.
Rings: 16 · Blocking pins: 10 · Stop pins: 0 · Slide bars: 12 · Clamps: 12 · Bombs: 0
The complete route is still being worked out. Only the opening moves below passed the current checks; they do not establish a full solution. This candidate assumes a clamp opens when its paired bar leaves; confirm this behavior in the game.
Rotate Ring 4 counterclockwise about 18°. Target opening direction: 343° (right 0°, up 90°). Release and wait. Expected departure: Ring 4, Ring 5. Expected remainder: 14 rings, 12 bars.
Rotate Ring 3 counterclockwise about 16°. Target opening direction: 297° (right 0°, up 90°). Release and wait. Expected departure: Ring 3, Ring 2. Expected remainder: 12 rings, 12 bars.
Rotate Ring 12 clockwise about 19°. Target opening direction: 196° (right 0°, up 90°). Release and wait. Expected departure: Ring 11, Ring 12. Expected remainder: 10 rings, 12 bars.
Rotate Ring 13 clockwise about 18°. Target opening direction: 242° (right 0°, up 90°). Release and wait. Expected departure: Ring 13, Ring 14. Expected remainder: 8 rings, 12 bars.
Rotate Ring 16 clockwise about 150°. Target opening direction: 300° (right 0°, up 90°). Release and wait. Expected departure: Ring 16. Expected remainder: 7 rings, 12 bars.
Move S5 left along its track about 5.43 ring radii. Continue until the bar leaves the board. Release and wait. Expected departure: S5. Expected remainder: 7 rings, 11 bars.
Move S3 left along its track about 7.14 ring radii. Continue until the bar leaves the board. Release and wait. Expected departure: S3. Expected remainder: 7 rings, 10 bars.
Rotate Ring 9 clockwise about 18°. Target opening direction: 72° (right 0°, up 90°). Release and wait. Expected departure: Ring 10, Ring 9. Expected remainder: 5 rings, 10 bars.
Move S8 right along its track about 5.43 ring radii. Continue until the bar leaves the board. Release and wait. Expected departure: S8. Expected remainder: 5 rings, 9 bars.
Move S4 right along its track about 7.14 ring radii. Continue until the bar leaves the board. Release and wait. Expected departure: S4. Expected remainder: 5 rings, 8 bars.
Rotate Ring 15 clockwise about 4°. Target opening direction: 341° (right 0°, up 90°). Release and wait. No departure is expected yet. Expected remainder: 5 rings, 8 bars.
Move S1 right along its track about 2.86 ring radii. Release and wait. No departure is expected yet. Expected remainder: 5 rings, 8 bars.
Rotate Ring 7 clockwise about 23°. Target opening direction: 67° (right 0°, up 90°). Release and wait. Expected departure: Ring 7. Expected remainder: 4 rings, 8 bars.
Positions refer to the diagram. Connections describe what to inspect, not an additional removal order.
| Ring | Position | Type |
|---|---|---|
| 1 | Center | Open |
| 2 | Lower center | Open |
| 3 | Lower center | Open |
| 4 | Center | Open |
| 5 | Center | Open |
| 6 | Center | Closed |
| 7 | Center | Open |
| 8 | Upper center | Open |
| 9 | Center | Open |
| 10 | Center | Open |
| 11 | Center | Open |
| 12 | Center | Open |
| 13 | Lower center | Open |
| 14 | Lower center | Open |
| 15 | Center | Open |
| 16 | Center | Open |
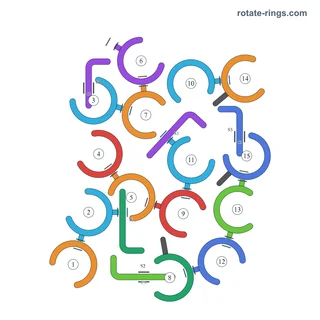
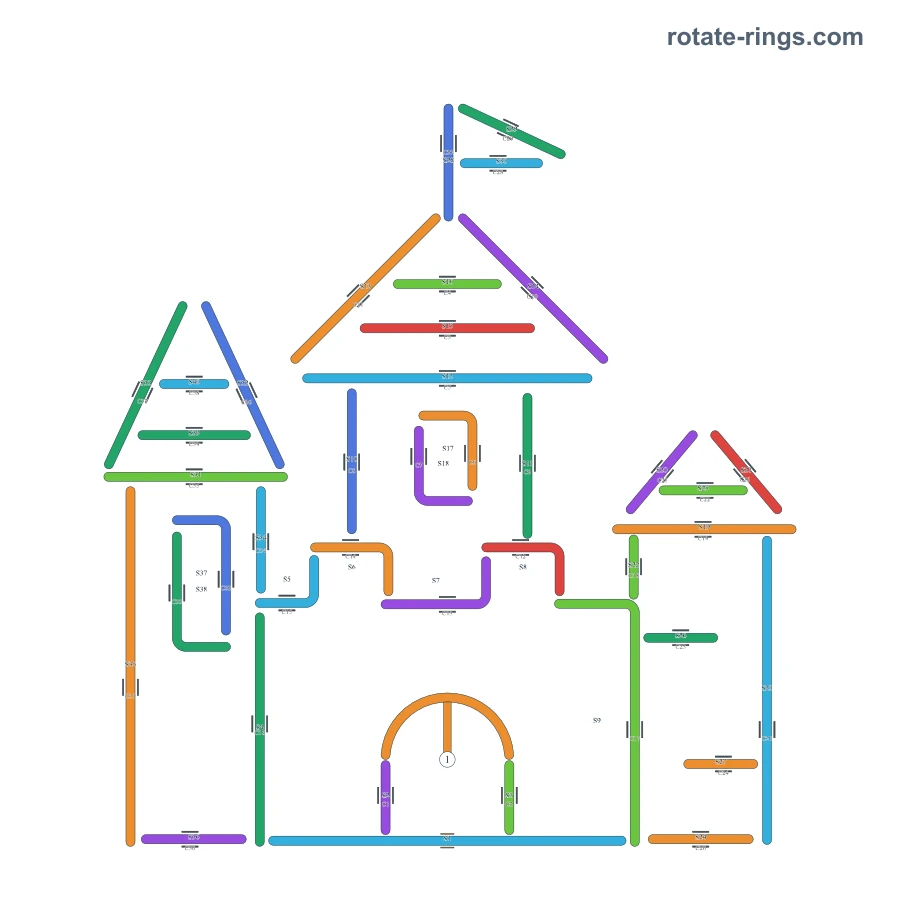
12 rings, 8 blocking pins, 13 slide bars, 13 clamps
123456789101112
Numbers identify the rings on the diagram; they do not specify an operation order.
Numbers identify individual rings; S labels bars, C labels clamps, and B marks a bomb. Match the colored rings, pins, slide bars and clamps to your board.
Rings: 12 · Blocking pins: 8 · Stop pins: 0 · Slide bars: 13 · Clamps: 13 · Bombs: 0
The complete route is still being worked out. Only the opening moves below passed the current checks; they do not establish a full solution. This candidate assumes a clamp opens when its paired bar leaves; confirm this behavior in the game.
Rotate Ring 3 clockwise about 71°. Target opening direction: 199° (right 0°, up 90°). Release and wait. Expected departure: Ring 3, Ring 4. Expected remainder: 10 rings, 13 bars.
Rotate Ring 12 clockwise about 139°. Target opening direction: 311° (right 0°, up 90°). Release and wait. Expected departure: Ring 5, Ring 12. Expected remainder: 8 rings, 13 bars.
Rotate Ring 7 clockwise about 22°. Target opening direction: 68° (right 0°, up 90°). Release and wait. Expected departure: Ring 7, Ring 6. Expected remainder: 6 rings, 13 bars.
Rotate Ring 9 clockwise about 161°. Target opening direction: 289° (right 0°, up 90°). Release and wait. Expected departure: Ring 9. Expected remainder: 5 rings, 13 bars.
Rotate Ring 10 clockwise about 165°. Target opening direction: 265° (right 0°, up 90°). Release and wait. Expected departure: Ring 10. Expected remainder: 4 rings, 13 bars.
Rotate Ring 2 clockwise about 165°. Target opening direction: 305° (right 0°, up 90°). Release and wait. Expected departure: Ring 2. Expected remainder: 3 rings, 13 bars.
Rotate Ring 1 clockwise about 165°. Target opening direction: 325° (right 0°, up 90°). Release and wait. Expected departure: Ring 1. Expected remainder: 2 rings, 13 bars.
Rotate Ring 11 clockwise about 165°. Target opening direction: 245° (right 0°, up 90°). Release and wait. Expected departure: Ring 8, Ring 11. Expected remainder: 0 rings, 13 bars.
Positions refer to the diagram. Connections describe what to inspect, not an additional removal order.
| Ring | Position | Type |
|---|---|---|
| 1 | Upper left | Open |
| 2 | Upper center | Open |
| 3 | Center | Open |
| 4 | Center | Open |
| 5 | Lower center | Open |
| 6 | Lower center | Open |
| 7 | Lower center | Open |
| 8 | Center | Open |
| 9 | Upper center | Open |
| 10 | Upper center | Open |
| 11 | Upper right | Open |
| 12 | Center | Open |
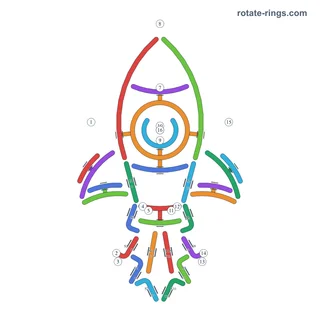
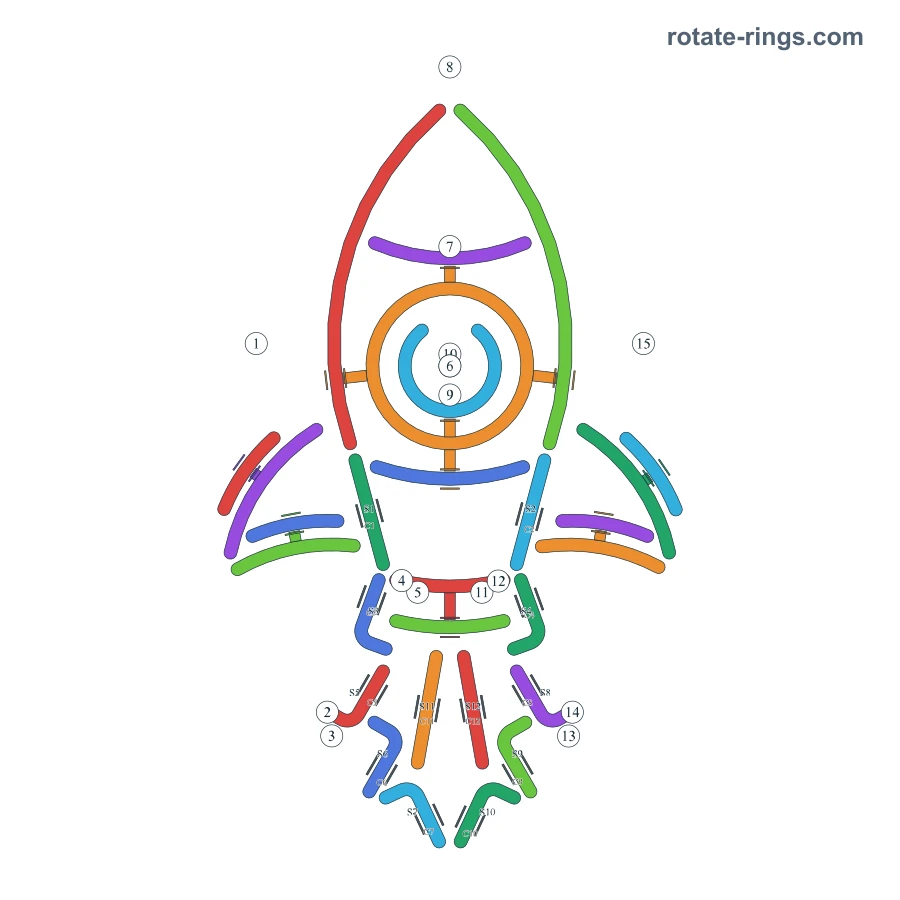
1 ring, 1 blocking pin, 40 slide bars, 39 clamps
1
Numbers identify the rings on the diagram; they do not specify an operation order.
Numbers identify individual rings; S labels bars, C labels clamps, and B marks a bomb. Match the colored rings, pins, slide bars and clamps to your board.
Rings: 1 · Blocking pins: 1 · Stop pins: 0 · Slide bars: 40 · Clamps: 39 · Bombs: 0
The complete route is still being worked out. Only the opening moves below passed the current checks; they do not establish a full solution. This candidate assumes a clamp opens when its paired bar leaves; confirm this behavior in the game.
Move S12 right along its track about 16.14 ring radii. Continue until the bar leaves the board. Release and wait. Expected departure: S12. Expected remainder: 1 rings, 39 bars.
Move S19 right along its track about 6.43 ring radii. Continue until the bar leaves the board. Release and wait. Expected departure: S19. Expected remainder: 1 rings, 38 bars.
Move S20 right along its track about 9.29 ring radii. Continue until the bar leaves the board. Release and wait. Expected departure: S20. Expected remainder: 1 rings, 37 bars.
Move S21 right along its track about 5.14 ring radii. Continue until the bar leaves the board. Release and wait. Expected departure: S21. Expected remainder: 1 rings, 36 bars.
Move S22 up along its track about 16.29 ring radii. Continue until the bar leaves the board. Release and wait. Expected departure: S22. Expected remainder: 1 rings, 35 bars.
Positions refer to the diagram. Connections describe what to inspect, not an additional removal order.
| Ring | Position | Type |
|---|---|---|
| 1 | Lower center | Open |
16 rings, 10 blocking pins, 12 slide bars, 12 clamps
12345678910111213141516
Numbers identify the rings on the diagram; they do not specify an operation order.
Numbers identify individual rings; S labels bars, C labels clamps, and B marks a bomb. Match the colored rings, pins, slide bars and clamps to your board.
Rings: 16 · Blocking pins: 10 · Stop pins: 0 · Slide bars: 12 · Clamps: 12 · Bombs: 0
The complete route is still being worked out. Only the opening moves below passed the current checks; they do not establish a full solution. This candidate assumes a clamp opens when its paired bar leaves; confirm this behavior in the game.
Rotate Ring 4 counterclockwise about 18°. Target opening direction: 343° (right 0°, up 90°). Release and wait. Expected departure: Ring 4, Ring 5. Expected remainder: 14 rings, 12 bars.
Rotate Ring 3 counterclockwise about 16°. Target opening direction: 297° (right 0°, up 90°). Release and wait. Expected departure: Ring 3, Ring 2. Expected remainder: 12 rings, 12 bars.
Rotate Ring 12 clockwise about 19°. Target opening direction: 196° (right 0°, up 90°). Release and wait. Expected departure: Ring 11, Ring 12. Expected remainder: 10 rings, 12 bars.
Rotate Ring 13 clockwise about 18°. Target opening direction: 242° (right 0°, up 90°). Release and wait. Expected departure: Ring 13, Ring 14. Expected remainder: 8 rings, 12 bars.
Rotate Ring 16 clockwise about 165°. Target opening direction: 285° (right 0°, up 90°). Release and wait. Expected departure: Ring 16. Expected remainder: 7 rings, 12 bars.
Move S5 left along its track about 5.43 ring radii. Continue until the bar leaves the board. Release and wait. Expected departure: S5. Expected remainder: 7 rings, 11 bars.
Move S3 left along its track about 7.14 ring radii. Continue until the bar leaves the board. Release and wait. Expected departure: S3. Expected remainder: 7 rings, 10 bars.
Rotate Ring 9 clockwise about 18°. Target opening direction: 72° (right 0°, up 90°). Release and wait. Expected departure: Ring 10, Ring 9. Expected remainder: 5 rings, 10 bars.
Move S8 right along its track about 5.43 ring radii. Continue until the bar leaves the board. Release and wait. Expected departure: S8. Expected remainder: 5 rings, 9 bars.
Move S4 right along its track about 7.14 ring radii. Continue until the bar leaves the board. Release and wait. Expected departure: S4. Expected remainder: 5 rings, 8 bars.
Positions refer to the diagram. Connections describe what to inspect, not an additional removal order.
| Ring | Position | Type |
|---|---|---|
| 1 | Center | Open |
| 2 | Lower center | Open |
| 3 | Lower center | Open |
| 4 | Center | Open |
| 5 | Center | Open |
| 6 | Center | Closed |
| 7 | Center | Open |
| 8 | Upper center | Open |
| 9 | Center | Open |
| 10 | Center | Open |
| 11 | Center | Open |
| 12 | Center | Open |
| 13 | Lower center | Open |
| 14 | Lower center | Open |
| 15 | Center | Open |
| 16 | Center | Open |
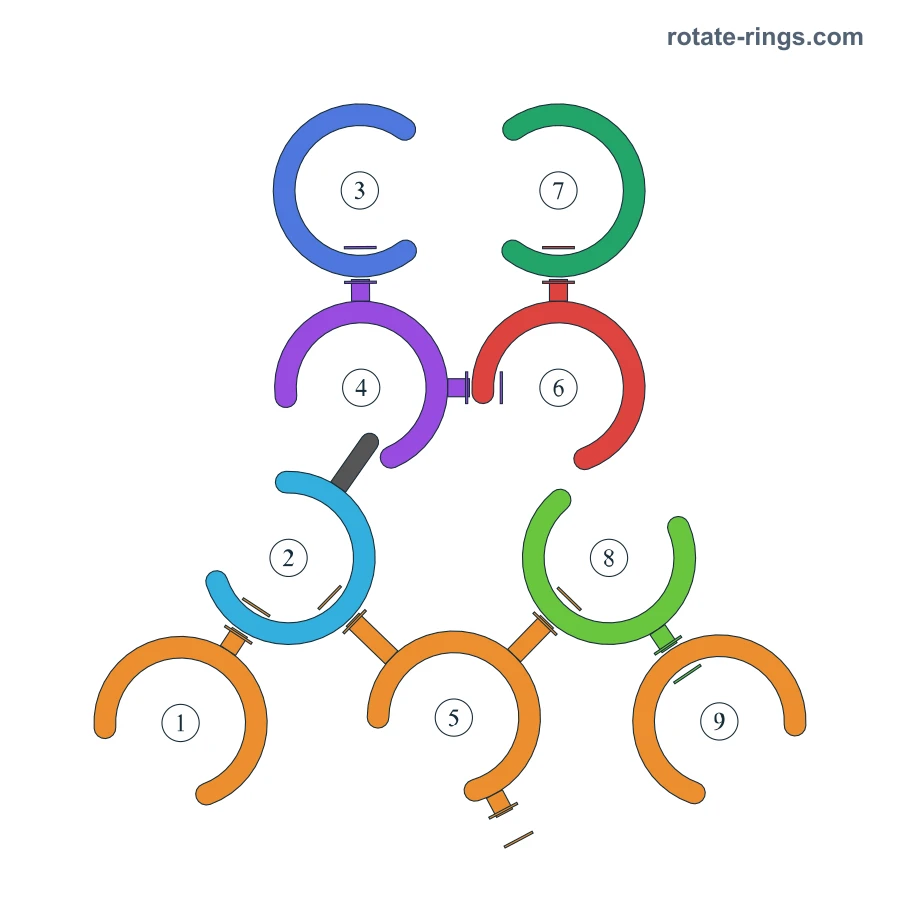
9 rings, 8 blocking pins
123456789
Numbers identify the rings on the diagram; they do not specify an operation order.
Numbers identify individual rings; S labels bars, C labels clamps, and B marks a bomb. Match the colored rings, pins, slide bars and clamps to your board.
Rings: 9 · Blocking pins: 8 · Stop pins: 1 · Slide bars: 0 · Clamps: 0 · Bombs: 0
Candidate walkthrough; gameplay confirmation is pending. Release after each move and wait for the expected departures. Stop and report the first mismatch.
Rotate Ring 3 clockwise about 60°. Target opening direction: 300° (right 0°, up 90°). Release and wait. Expected departure: Ring 3. Expected remainder: 8 rings, 0 bars.
Rotate Ring 2 counterclockwise about 62°. Target opening direction: 207° (right 0°, up 90°). Release and wait. Expected departure: Ring 1. Expected remainder: 7 rings, 0 bars.
Rotate Ring 2 counterclockwise about 79°. Target opening direction: 286° (right 0°, up 90°). Release and wait. Expected departure: Ring 2. Expected remainder: 6 rings, 0 bars.
Rotate Ring 4 clockwise about 17°. Target opening direction: 223° (right 0°, up 90°). Release and wait. Expected departure: Ring 4. Expected remainder: 5 rings, 0 bars.
Rotate Ring 7 counterclockwise about 60°. Target opening direction: 240° (right 0°, up 90°). Release and wait. Expected departure: Ring 6, Ring 7. Expected remainder: 3 rings, 0 bars.
Rotate Ring 9 clockwise about 150°. Target opening direction: 154° (right 0°, up 90°). Release and wait. Expected departure: Ring 9. Expected remainder: 2 rings, 0 bars.
Rotate Ring 8 counterclockwise about 119°. Target opening direction: 196° (right 0°, up 90°). Release and wait. Expected departure: Ring 5, Ring 8. Expected remainder: 0 rings, 0 bars.
Positions refer to the diagram. Connections describe what to inspect, not an additional removal order.
| Ring | Position | Type |
|---|---|---|
| 1 | Lower left | Open |
| 2 | Middle left | Open |
| 3 | Upper center | Open |
| 4 | Center | Open |
| 5 | Lower center | Open |
| 6 | Center | Open |
| 7 | Upper center | Open |
| 8 | Middle right | Open |
| 9 | Lower right | Open |
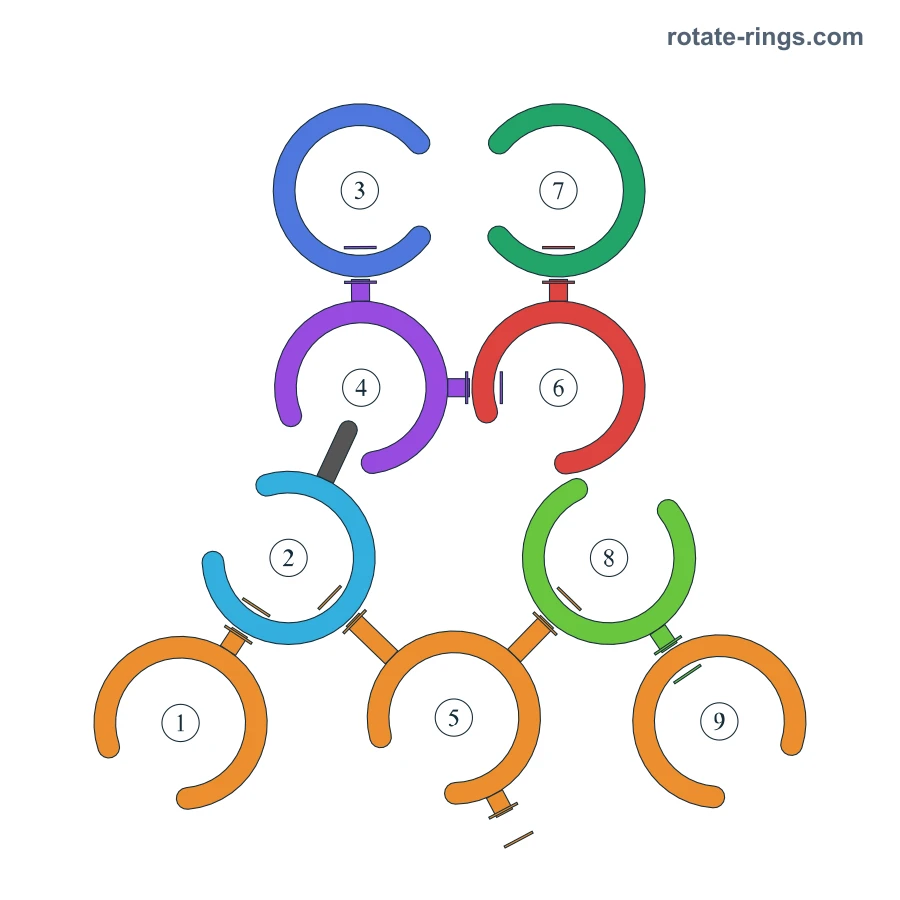
9 rings, 8 blocking pins
123456789
Numbers identify the rings on the diagram; they do not specify an operation order.
Numbers identify individual rings; S labels bars, C labels clamps, and B marks a bomb. Match the colored rings, pins, slide bars and clamps to your board.
Rings: 9 · Blocking pins: 8 · Stop pins: 1 · Slide bars: 0 · Clamps: 0 · Bombs: 0
Candidate walkthrough; gameplay confirmation is pending. Release after each move and wait for the expected departures. Stop and report the first mismatch.
Rotate Ring 3 clockwise about 75°. Target opening direction: 285° (right 0°, up 90°). Release and wait. Expected departure: Ring 3. Expected remainder: 8 rings, 0 bars.
Rotate Ring 7 counterclockwise about 75°. Target opening direction: 255° (right 0°, up 90°). Release and wait. Expected departure: Ring 7. Expected remainder: 7 rings, 0 bars.
Rotate Ring 6 clockwise about 42°. Target opening direction: 195° (right 0°, up 90°). Release and wait. Expected departure: Ring 4, Ring 6. Expected remainder: 5 rings, 0 bars.
Rotate Ring 9 clockwise about 165°. Target opening direction: 139° (right 0°, up 90°). Release and wait. Expected departure: Ring 9. Expected remainder: 4 rings, 0 bars.
Rotate Ring 8 counterclockwise about 134°. Target opening direction: 211° (right 0°, up 90°). Release and wait. Expected departure: Ring 8. Expected remainder: 3 rings, 0 bars.
Rotate Ring 2 counterclockwise about 77°. Target opening direction: 222° (right 0°, up 90°). Release and wait. Expected departure: Ring 1. Expected remainder: 2 rings, 0 bars.
Rotate Ring 2 counterclockwise about 79°. Target opening direction: 301° (right 0°, up 90°). Release and wait. Expected departure: Ring 2, Ring 5. Expected remainder: 0 rings, 0 bars.
Positions refer to the diagram. Connections describe what to inspect, not an additional removal order.
| Ring | Position | Type |
|---|---|---|
| 1 | Lower left | Open |
| 2 | Middle left | Open |
| 3 | Upper center | Open |
| 4 | Center | Open |
| 5 | Lower center | Open |
| 6 | Center | Open |
| 7 | Upper center | Open |
| 8 | Middle right | Open |
| 9 | Lower right | Open |
This page has 6 distinct boards. The default A board has 16 rings and 10 blocking pins. Compare these features and the thumbnails before following its steps.
They identify individual rings, not the operation order. A written step can also describe a bar or latch, so the step number is not always the ring number. Match the ring number named in the instruction with the diagram.
Check whether the ring is open or closed, whether a stop pin limits rotation and whether a latch is still locked by a bar. Repeated rotation does not remove a fixed obstruction. Compare the neighboring connections, then return to the step for the matching ring number.